|
NM-422ETH
NMEA-0183 Multiplier With Ethernet Interface (User Guide) Introduction, Operation, Inputs, Outputs, Power supply, Connections, Connecting Ethernet interface, Led indicators, Configuring as Dual Converter, AutoPilot port, Specifications, troubleshooting, Installing Discovery utility, Using Discovery utility, DHCP Configuration, Manual Configuration, Virtual Port, UDP configuration, Downloads
|

Price 270.00 Euro
On-line orders -15% |
STEP 5:
Select the UDP sockets radio button and press Apply
Select the UDP sockets radio button and press Apply

STEP 6:
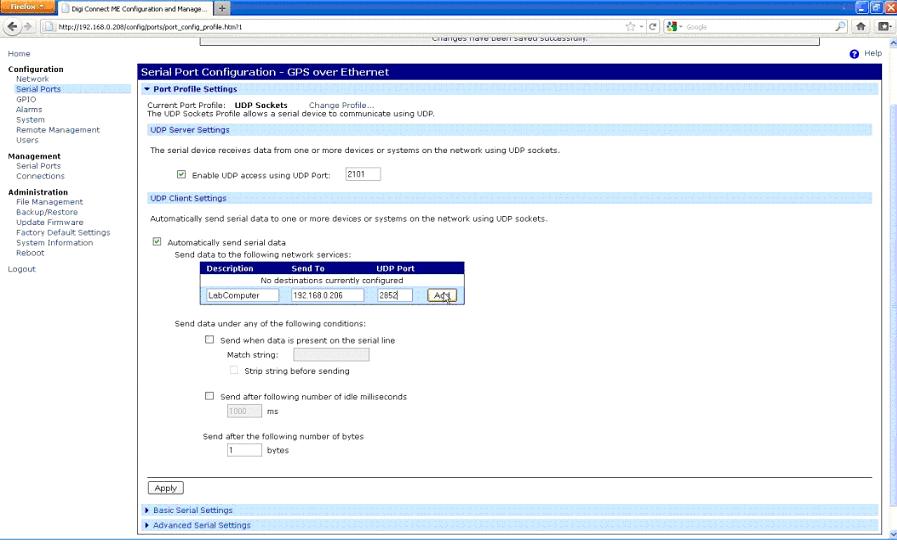
Configure the new page as shown below.
1. Select the Automatically send serial data option
2. Deselect the Send after following number of milliseconds option if enabled
3. Set the number of bytes to “1” in the Send after the following number of bytes option
4. In the box under the Send data to the following network services fill a distinctive name for the computer that will receive the data, the IP address and the UDP port the software is configured for reception and press the Add button.
With the UDP multicast feature you can add multiple computers provided that you specify each time the above particulars and add it to the table
STEP 7:
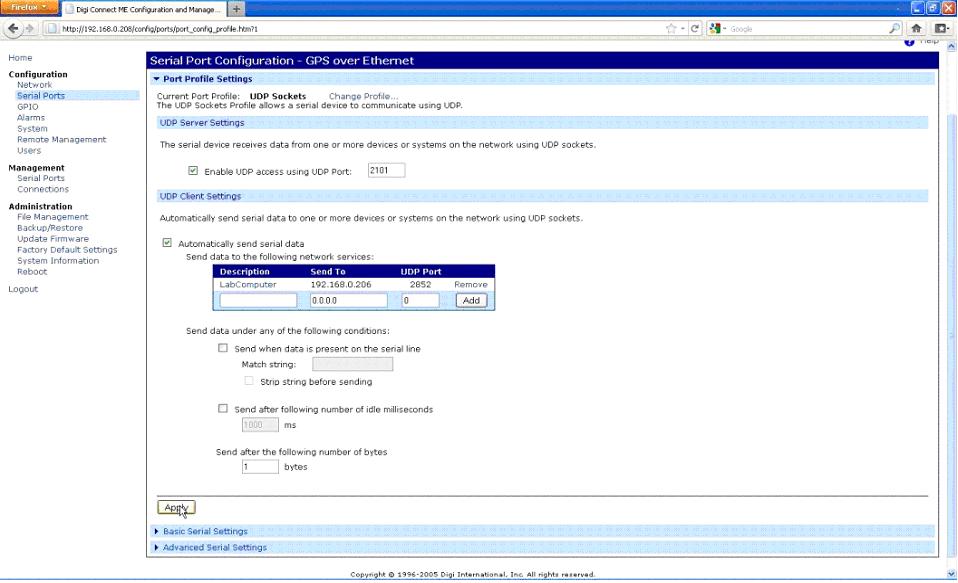
After successful configuration of the Port Profile Settings menu it should look as follows. Click on Apply to store the changes
After successful configuration of the Port Profile Settings menu it should look as follows. Click on Apply to store the changes
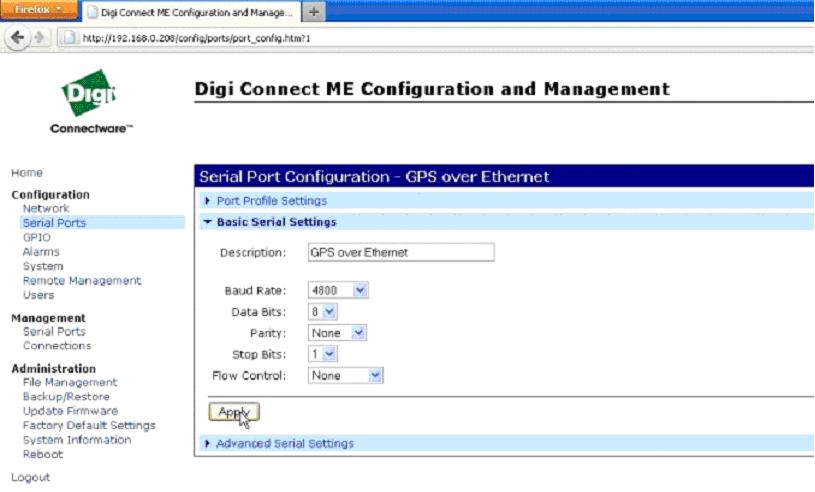
STEP 8:
Click on the Basic Serial Settings menu and configure Baud rate to 4.800, Data Bits to 8, Parity to None, Stop Bits to 1 and Flow Control to None. Supply a name in the Description edit box to describe configured NM-422ETH device
Click on the Basic Serial Settings menu and configure Baud rate to 4.800, Data Bits to 8, Parity to None, Stop Bits to 1 and Flow Control to None. Supply a name in the Description edit box to describe configured NM-422ETH device
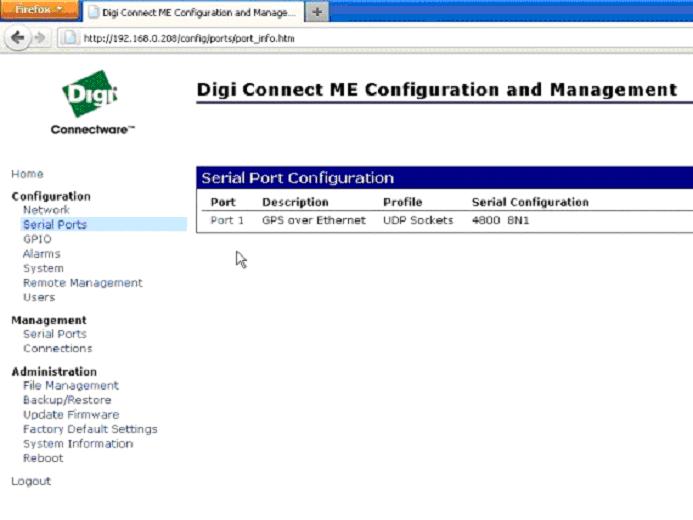
STEP 9:
After successful completion select Serial Ports menu to confirm the changes. Click on Logout to end the configuration procedure
After successful completion select Serial Ports menu to confirm the changes. Click on Logout to end the configuration procedure