|
NM-422ETH
NMEA-0183 Multiplier With Ethernet Interface (User Guide) Introduction, Operation, Inputs, Outputs, Power supply, Connections, Connecting Ethernet interface, Led indicators, Configuring as Dual Converter, AutoPilot port, Specifications, troubleshooting, Installing Discovery utility, Using Discovery utility, DHCP Configuration, Manual Configuration, Virtual Port, UDP configuration, Downloads
|

Price 270.00 Euro
On-line orders -15% |
Installing Virtual Port Drivers (Windows XP)
|
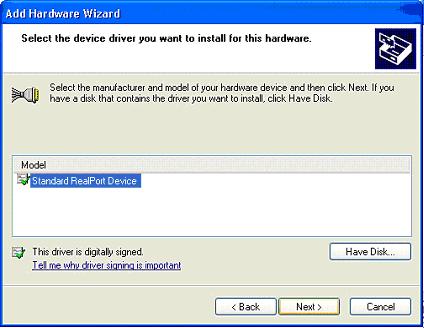
STEP 10: After correct selection of driver folder, Driver for NM-22ETH should appear as a Standard RealPort Device. If so continue by pressing Next. Otherwise search in another location |
|
|
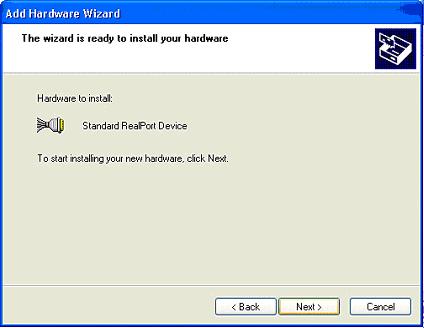
STEP 11: The wizard is ready to complete installation. Click Next to continue |
|
|
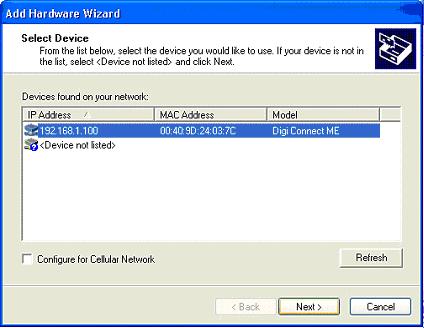
STEP 12: The device should be listed as in this figure. IP address could take a value assigned by DHCP server and might vary from the indicated value. Click Nextto continue |
|
|
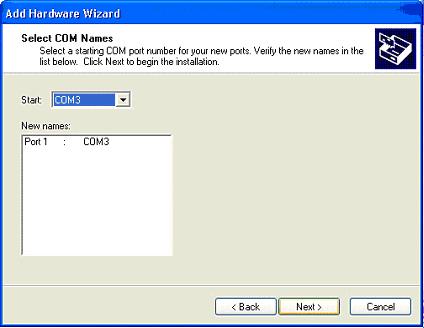
STEP 13: Select which COM Port Name will be assigned in virtual serial port (selection of default Port is recommended). Click Nextto continue |
|
|
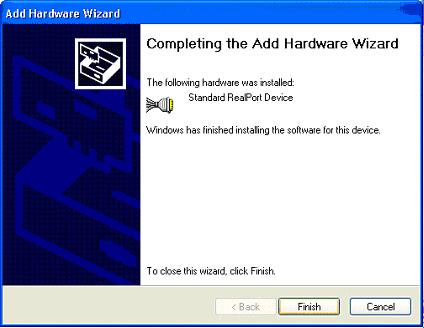
STEP 14: Click finish to complete installation |
|
|
STEP 15: After completion the Device Manager should look like in this figure |

|
